Contact Paper Snowman
15 Minutes: 2 and up: Holiday: Winter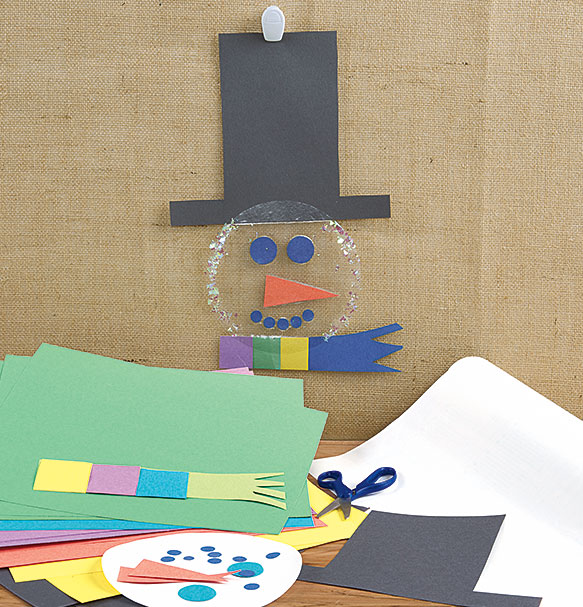
Contact Paper Snowman

An Activity for Preschoolers:
This is a great project for our K – 3 classroom hallways. Each grade level does a different craft for each season. Our class made snowmen that hang from the ceiling and is two-sided.
Before You Begin:
Gather the following: clear contact paper, construction paper in a variety of colors and scissors. Prior to doing this craft with your class, you will need to cut out two 6-inch circles from clear contact paper.
Activity Goals:
A double-sided activity that can be scaled for a variety of grade levels. Identify and learn about shapes while creating this interesting snowperson.
Furthermore:
For younger children, you may choose to cut the shapes for facial features in advance. Younger children may need help cutting and using the contact paper.
Let's Get Started
STEP 1
Cut shapes from construction paper to create each snowpal’s features. Cut round black circles from construction paper for the eyes and mouth, a black hat shape, orange triangles for the nose and multicolored squares for the scarf. The last scarf square should be double the size with one end fringed.
STEP 2
Peel the protective paper from the contact paper.
STEP 3
Arrange pieces cut out for the eyes, nose, mouth and scarf onto the sticky side of the contact paper.
STEP 4
Lay the hat at the top of the contact paper.
STEP 5
Peel the protective paper from another sheet of contact paper and place it on top of the first piece.
STEP 6
Hang your smiling snowpals in your classroom for the children to admire.

Comments are held for moderation, thank you.